Setting up Charles to Proxy your iOS Device
Capturing network traffic is a useful method for debugging any application. Using a network proxy like Charles makes it very easy to see the data that your app is sending/recieving. This post will cover the steps to setup an iOS device to use Charles as a proxy.
More recently, I’ve found Proxyman to be an easier tool to setup and use compared to Charles.
🛠 Configure Charles
We’ll need to specify some initial configuration settings for Charles before we start capturing traffic.
- Verify the port that Charles can listen on. Default is
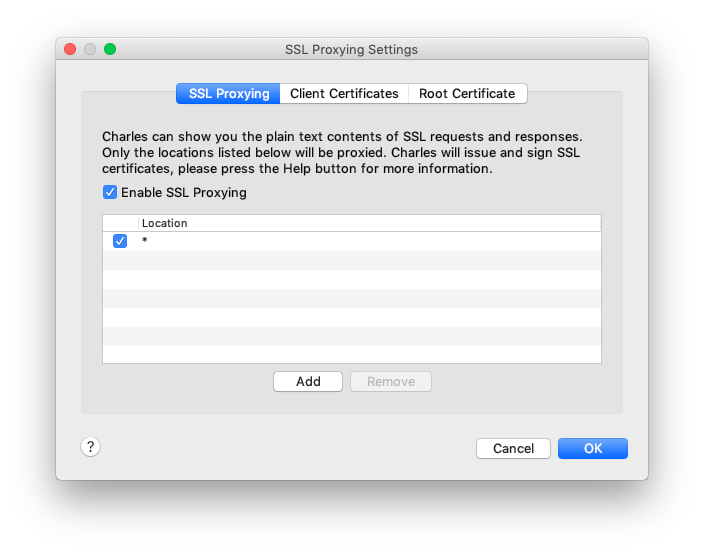
8888. From the Menu go to Proxy then Proxy Settings. In the Proxies tab you’ll find the port #. - Enable SSL Proxying. From the menu go to Proxy then SSL Proxying Settings. In the SSL Proxying tab make sure SSL Proxying is enabled. Also add a wildcard entry to capture everything for now. This can be changed later to filter out certain domains depending on what traffic you want to see.
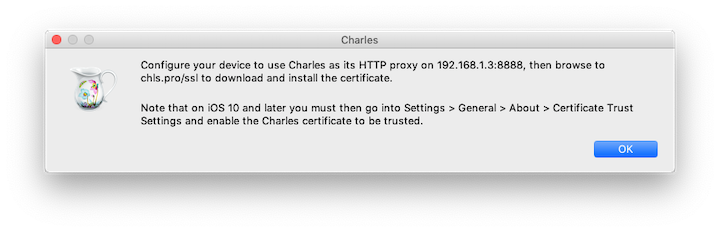
- Get the IP address. From the menu go to Help then SSL Proxying then Install Root Certificate on Mobile Device or Remote Browser. Make note of your computer’s IP address and port.
- Start the proxy if it didn’t autostart.
📱 Configure iPhone to use Proxy
Since I’m using an iPhone for this tutorial, these instruction will be specific to iOS. However similar steps will also work for Android.
-
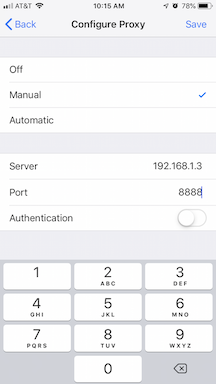
Connect to the proxy by configuring the Wi-Fi connection on the iPhone to use Charles. From the Settings Menu go to Wi-Fi, then tap the little
inext to the network you’re connect too. Then tapConfigure Proxythen Manual and add the IP and port from the previous steps. -
Accept prompt that pops up in Charles. You’ll know that a conection has started if you see this prompt.
-
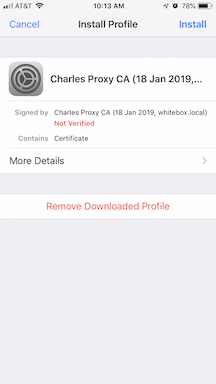
While connected to the proxy, download and install charles root certificate on the iPhone. After going to this url chls.pro/ssl, follow all the prompts to download and install the cert.
-
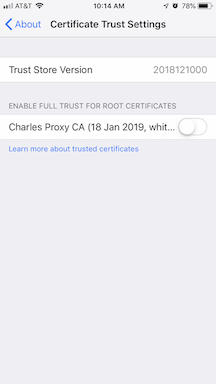
Enable the root cert by going to Settings, General, About, sroll to the bottom and tap Certificate Trust Settings. Enable the toggle for the root cert on that page.
Notes
iOS bug saving manual proxy configuration. If this happens, just forget the network and re-add it. I noticed this behavior on iOS 12.3.1.
This setup was all done with devices on the same LAN through Wi-Fi. I can’t speak for other configurations.
Some apps implement SSL certificate pinning which means they specifically validate the root certificate. Because the app is itself verifying the root certificate it will not accept Charles’s certificate and will fail the connection. If you have successfully installed the Charles root SSL certificate and can browse SSL websites using SSL Proxying in Safari, but an app fails, then SSL Pinning is probably the issue.